Espresso is absolutely delicious and so versatile! Whether you drink it black or in a creamy latte, espresso is arguably the most popular coffee format. To make it properly, however, a few key pointers can go a long way. Let me walk you through the process of pulling a perfect shot of espresso, how you can calibrate your espresso machine for consistent results in just a few simple steps, and how you can troubleshoot any common issues you may have!

1. Weigh out 18 grams of fresh, medium- to dark-roasted coffee beans.
The most important step in making espresso, or any coffee, for that matter, is using fresh coffee beans. Without fresh beans, the flavor will be lackluster, and your espresso will not achieve a creamy foam top, or crema. Only use coffee beans that have been in sealed packaging for less than 6 months or have been opened for less than one month. While coffee is fine to drink past these time frames, the flavor and the bean's ability to produce crema will drastically diminish. Of course, I recommend our African Espresso Blend, roasted to order for you, guaranteeing freshness and amazing espresso. It is made from medium-dark roasted beans from across the African continent- my personal favorite coffee!
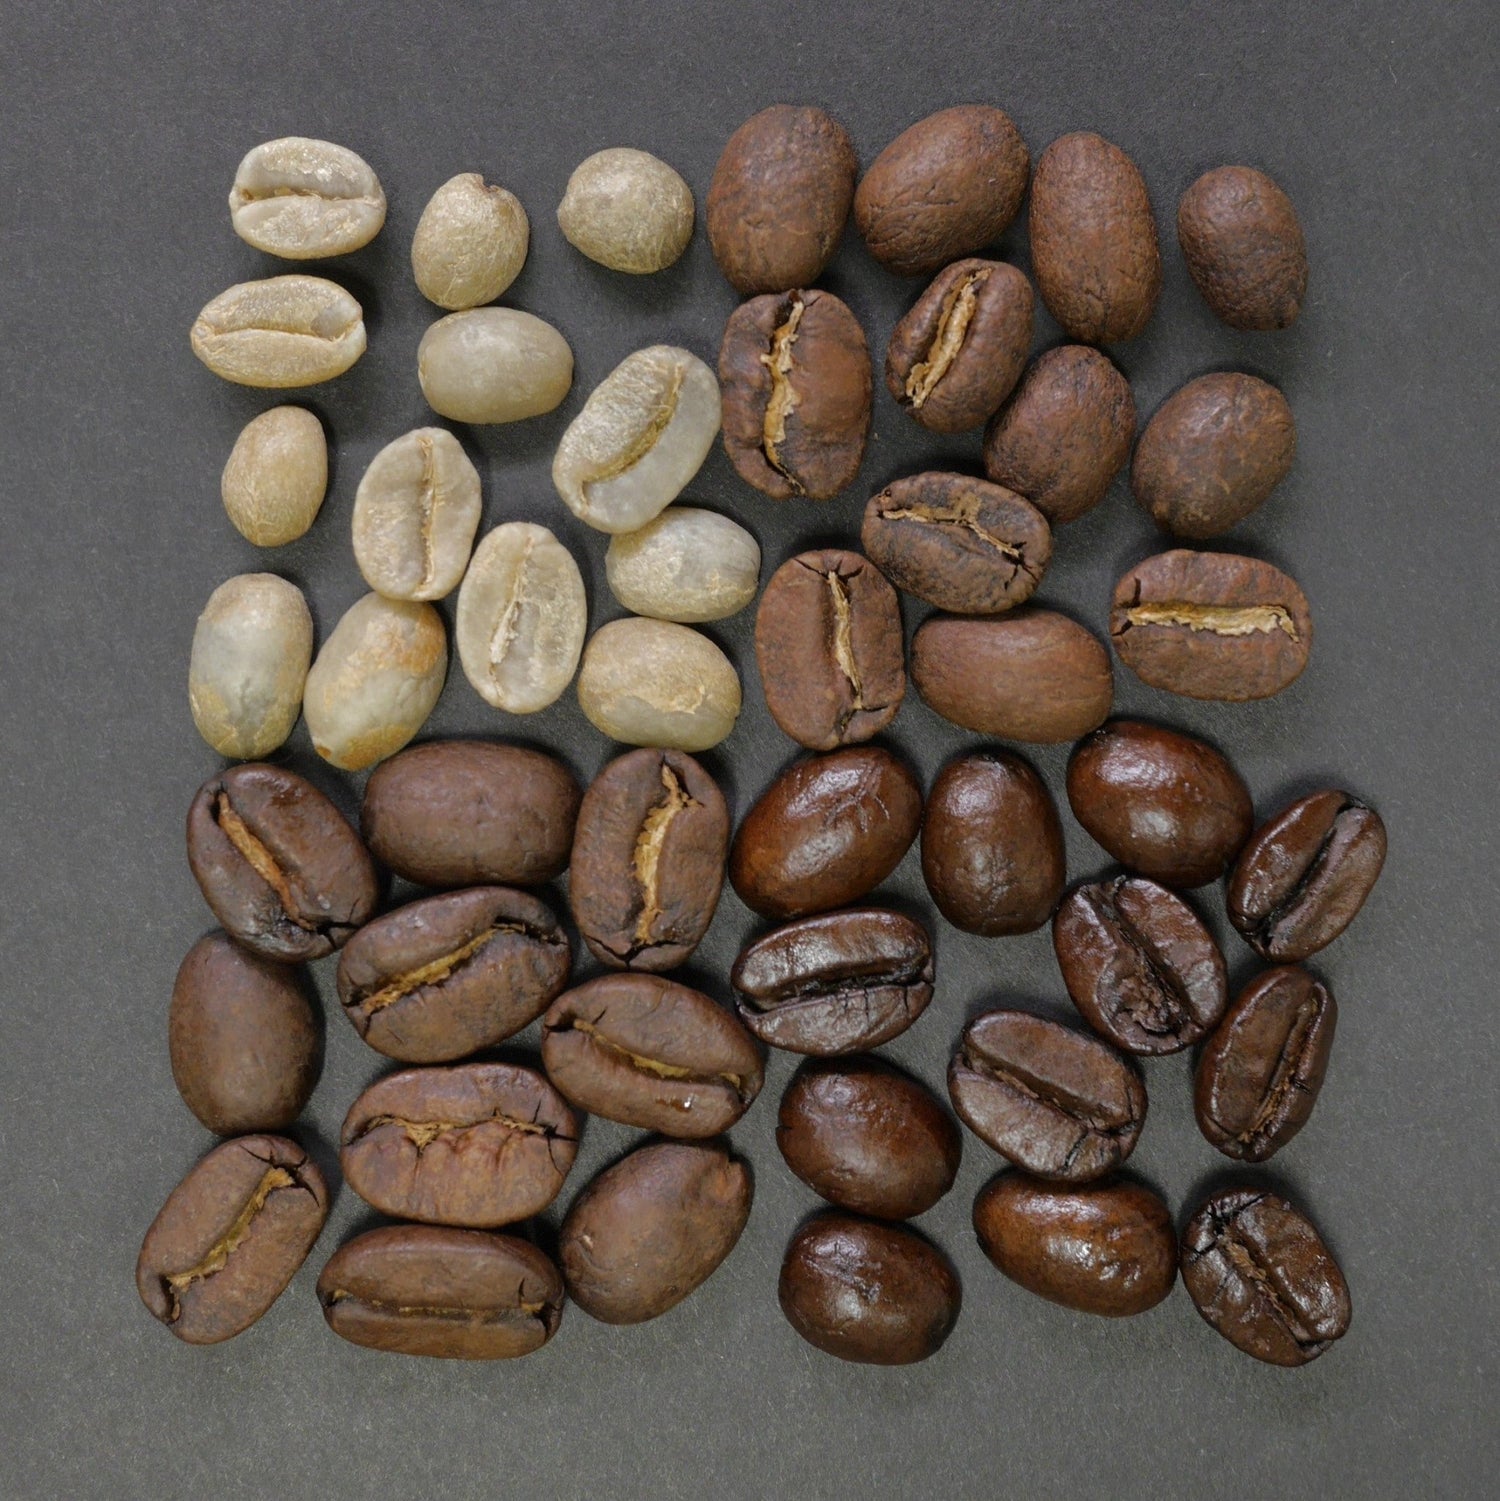
Additionally, only medium- to dark-roasted coffee beans should be used for brewing espresso if you want that signature toasty, caramelized flavor. During the roasting process, the sugars inside the coffee bean caramelize and are forced, via gas expansion, to the surface, where an oily film is deposited on the outside of the bean. This oil is necessary for the crema on top of espresso to develop. The roasting of the beans also breaks down the cells inside the beans and develops a rich flavor necessary to stand up to the intensity of milk for lattes and cappuccinos.
For a standard double espresso, 18 grams is the standard weight and fills the portafilter of the espresso machine properly. I strongly recommend investing in a scale that has at least one decimal so that you can weigh out the coffee beans as close to 18.0 grams as possible. My recommendation, and the scale I personally use, is this one. It runs just over $20 and rechargeable and automatically starts a timer for you!
Note that some espresso machines, especially the more automatic ones, are sometimes calibrated to anywhere between 15 and 18 grams. Reference your machine's manual if you're unsure.

2. Finely grind the coffee beans in a designated coffee grinder.
It is very important to use a coffee grinder designed for espresso grinding. Most coffee grinders are too coarse for espresso-sized grounds, which have to be quite fine. Another common issue is the design of these grinders. While they may be able to grind the desired size, the design of the inside of the grinder actually promotes clogging from the fine coffee dust, quickly deteriorating the life of the grinder and requiring constant cleanings.
There are two main styles of espresso grinders, and both are burr grinders, where two gears with sharp teeth grind in opposite directions to consistently grind coffee beans. The first and easiest option is the grinder built into your espresso machine. If your machine has one, these are fantastic to use, especially as you get started brewing your own espresso and you just shelled out a decent amount of money for an espresso machine. Many of these grinders built into espresso machines actually require loading a lot of coffee beans into the bean hopper reservoir to allow the pressure of gravity to force the beans into the grinder. Be sure to keep these grinders at least half full.
The other style of grinder is a freestanding burr grinder, designed to handle espresso-sized grinds and built to only process the amount of beans you want for one espresso. They typically do not have a hopper or bean reservoir on top and only have a large enough opening to pour a specific amount of beans into the grinder. These precision grinders are often far more consistent in grind size and therefore produce better espresso, at the cost of being significantly more expensive than the grinder that is built into your machine. My favorite grinder for this purpose is the Fellow Opus, for both, its aesthetic design and functionality, with the added benefit of being a great value!
It almost goes without saying, but do not use pre-ground coffee for espresso. It is often too coarse and rarely fresh enough to use in your espresso. The exception to this is if you do not have access to a proper burr grinder for espresso and you have a local coffee roaster who will grind their very fresh coffee to the right size for espresso brewing for you. If you go this route, I strongly recommend buying only enough coffee for one week, as ground coffee goes stale far more quickly than whole beans.

3. Weigh the ground coffee.
For built-in grinders, do not weigh your coffee before grinding. Instead, weigh either the portafilter or a small container and zero (tare) it on your scale, then grind 18.0 grams of coffee, reweigh, and add or remove coffee grounds as necessary.
For precision coffee grinders designed to grind a pre-weighed amount of coffee beans, weigh 18.0 grams of whole beans, add them to the grinder, and grind the beans into a weighed and zeroed container (which often comes with the grinder). If you notice that the 18.0 grams of coffee beans you put into the grinder come out as less than 18.0 grams, you are losing some grounds inside the grinder, which means you don't get enough grounds for a proper espresso, and you're slowly clogging your grinder.
An easy remedy is to get a cheap atomizer and fill it with water. Simply spray the whole beans once and shake them before adding them to the grinder. This will reduce the static that traps the grounds and increase your conversion rate of beans to grounds. If you still lose too much coffee, it's time to clean your grinder!

4. Load the portafilter.
This step is already taken care of if you use your built-in coffee grinder. If you use a precision grinder, transfer the coffee grounds to your portafilter—the brew basket attached to the handle.

If you struggle with spilling coffee grounds, I recommend using a ring funnel. This is a short funnel that sits on top of the portafilter, is the same width, and essentially increases the wall height to direct the coffee grounds into the brew basket. They come in either magnetic or screw-on styles, and both work well.
Next, distribute the coffee grounds evenly in the brew basket using a WDT tool. This step is best performed with the funnel in place to prevent the coffee grounds from spilling out.

What is a WDT tool, and how does it work?
A WDT tool uses several fine needles to break up coffee grounds in the portafilter and significantly improve espresso extraction and consistency, resulting in better flavor. John Weiss created WDT, which stands for "Weiss Distribution Technique," in 2004.

After distributing the coffee grounds using the WDT tool, gently knock your portafilter on the edge of your work surface, such as the countertop. This allows the grounds to compact in the portafilter and makes removal of the funnel easier without spilling. Some portafilters have a rubber "foot" at the front of the basket so that the rubber foot hits the countertop instead of the metal pour spouts directly. If your portafilter does not have this rubber support, place a dish towel on the counter before knocking to prevent scratches and damage to both the portafilter and the counter.

I recommend further distributing the coffee using a coffee distributor tool like the one above. While not necessary, these do help evenly spread out the coffee grounds and can improve the extraction. They look like a short, round cylinder, slightly larger than the brew basket, and typically have a wavy stainless steel bottom that, when spinning, glides over the coffee grounds and flattens them out evenly. If you choose not to use a coffee distributor tool, be sure to distribute the coffee grounds as evenly as you can using the WDT tool before tamping.
5. Tamp the espresso grounds.
Next, use a tamper to compress the coffee grounds to prevent channeling and achieve a proper extraction. Make sure you press straight down on the coffee and not at any angle. Your goal is to achieve a flat espresso puck. This forces the water to flow through the now-compressed space between the fine coffee grounds, coming into contact with as much coffee as possible to extract lots of flavor. If the coffee is not compressed enough and channeling occurs, the resulting coffee will taste sour.
TIP: Compressing coffee is important to prevent channeling. This is when pressurized water finds the most direct route through air pockets, bypassing much of the coffee.

Some tampers are spring-loaded and make determining the right pressure extremely easy. I recommend this one! If your tamper does not have springs, use firm pressure until the coffee feels compressed and does not give way. If you are concerned about tamping too much, remember that espresso extracts at far more pressure than you or I can compress coffee grounds. Once the air is out, you're good to go and likely won't cause any harm to the coffee you're about to brew by tamping hard.
After tamping your coffee grounds in the portafilter, you are ready to brew. Although optional, it can be beneficial to place a puck screen on top of the grounds to help keep the espresso machine clean. Simply place a metal puck screen on top of the tamped grounds and use an air duster bulb to blow away any rogue coffee grounds.

6. Fill your espresso machine with the right water.
The two most important elements in coffee are grinding and water. Coffee is, after all, mostly water. It is extremely important for you to use the correct kind of water. I recommend using purified water, the kind that is available in the 1- or 3-gallon jug. This water usually has the right balance of minerals and carbonates to create a well-extracted espresso. I discourage tap or spring water because these often are too "hard" or fluctuate too drastically in mineral content, causing your espressos to be highly inconsistent and often over- or under-extracted. Likewise, do not use distilled water. The absence of all minerals will actually leach metal from the pipes inside your espresso machine, causing them to rust and corrode quickly. If you live in a city with very good tap water, you can also get away with running the tap water through a Brita filter and using that. I recommend you double-check your water parameters before going this route.
I wrote an entire article on the best water for brewing espresso for your situation and how you can check your water parameters to ensure it is great for brewing espresso while preserving the life of your very expensive espresso machine. Check it out here!
Water temperature is also important, but most espresso machines today do this step automatically, so I will only briefly touch on this. Simply aim for a water temperature between 90 and 95 °F, depending on how hot you like it. If your espresso machine gives you the flexibility to adjust the temperature, play around with it and see what gives you the right taste profile after you've dialed in all your other variables. The taste change will be fairly minuscule. The general recommendation is that if your coffee is too sour, increase the temperature, and if it is too bitter, decrease the temperature.

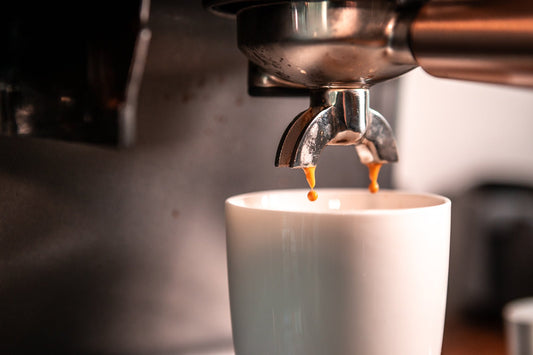
7. Pull a 36-gram espresso shot in 20–35 seconds.
Before you insert the portafilter into the espresso machine, I recommend purging the machine by pressing the single espresso button or opening up the water channel without inserting the portafilter. Simply let a little water flow through and out of the machine. This removes any stale water that has been sitting in the pipes inside the espresso machine while it was not in use.
After the purging is complete, insert your portafilter into your espresso machine, place your scale on the platform under the portafilter, and place your glass on top of the scale. Zero out your scale and set a timer. You are going to weigh the espresso in the glass and the time it takes to extract the espresso. You should start the timer the moment you start the espresso, not the moment you see the first espresso appear in the glass.

Run the brew cycle until the scale reads twice the weight of the espresso you loaded into the portafilter—typically 36 grams if you used 18 grams of ground coffee. The extraction should take between 20 and 35 seconds to reach 36 grams. Dark roasts should take between 20 and 25 seconds, medium roasts between 25 and 30 seconds, and light roasts between 30 and 35 seconds.
| Roasting Level | Appearance | Extraction time for 36 grams |
| Light Roast | tan to light brown | 30-35 seconds |
| Medium Roast | deep brown with no shine | 25 - 30 seconds |
| Dark Roast | dark brown to black, often with shine | 20 - 25 seconds |
If your espresso machine has a pressure gauge, you can monitor your brew to verify that the pressure is correct by aiming for 9 bars or 130 psi of pressure.
The 18:36 gram, or 1:2 ratio, is the industry standard. You are more than welcome to vary these. Italians often prefer a stronger and smaller espresso with a 1:1.5 ratio that is closer to 25–30 grams in final weight. If you adjust this ratio or the amount of grounds you use, make sure you use the right size brew basket that fits the espresso well (single vs. double) and focus on maintaining the extraction time. This often translates to grinding the coffee beans a lot finer to achieve the same brew duration.
Why does the extraction time vary between roasting levels?
The darker the coffee is roasted, the more porous it becomes as the beans dry out, and the more easily water can extract all the flavor from the beans. Therefore, darker roasts extract more quickly than lighter roasts, especially with high-pressure brewing methods like espresso brewing.
8. Adjust your grinder and espresso machine settings.
If you followed all the steps above, the adjustment step becomes quite easy, and you'll be able to dial in your settings in no time. If your espresso shot reached 36 grams faster than it was supposed to, your coffee grounds are too coarse. Simply decrease the grind size a few notches and start again at step 1. If your espresso pulls too slowly, your coffee grounds are too fine. Simply increase the grind size a few notches and try again at step 1.
9. Repeat.
It may take you a few tries to dial in your espresso. It is important to remember that you will likely also need to recalibrate your espresso as you change your beans to a different brand, roasting level, or origin, as most beans do not act the same in an espresso machine. If you recently switched coffee beans and you're confused as to why your espresso is suddenly not coming out the same way, try following this process with your new beans, and we promise that you'll be drinking better espresso in no time.

Why is espresso roasted dark?
Dark, or espresso, roasts are best for espresso because the longer roasting develops an oily film on the beans necessary to achieve the foamy crema on top of espresso and because the darker roast is bold enough to sustain the addition of milk and cream.
What are the three components or variables in espresso?
The three components that create great espresso are the grind, the dose, and the water. The grind size and consistency, coupled with the right dose, or weight, of fresh coffee grounds and the best-balanced water at the right volume, create great espresso.
The grind size should be fine—closer to powder than sand—and consistent in size from grain to grain. The grind size directly affects the amount of time it takes for the espresso to brew, or pull, and will dictate the flavor of the final espresso. The grind itself is not enough, however. The freshness of the coffee being used is also highly important. Fresh coffee, less than one month old and ideally less than two weeks old, will allow you to create that frothy crema on top of your espresso.
The dose is the second crucial component in espresso. It's important to weigh out exactly 18.0 grams, not 18 grams (yes, the decimal place matters and should be zero) for you to brew a classic and perfect espresso. Some espresso machines vary and will tell you in the instruction manual if this weight needs to be decreased. Regardless of the required weight, your final espresso should weigh twice as much as the coffee you used.
If you put 18.0 grams of ground coffee into your portafilter, the brewed espresso in the glass should be 36.0 grams. The espresso should be extracted from the button press to the finished espresso in 20–35 seconds. The lighter the roast, the longer it should take.
Be sure to always use fresh water with the right mineral balance. If you want to take the guesswork out of it, just use purified water from the store. Otherwise, I have a comprehensive water guide for brewing espresso here that will guide you to the best water option for your lifestyle.
Why are espressos made with 18 grams of coffee?
The amount of coffee used in espressos can vary, but the industry standard has become 18.0 grams as it strikes a balance between creating enough brewed espresso for commercial lattes and cappucinos to satisfy customers while controlling coffee bean costs and generating the most profit possible.
Why is my espresso inconsistent?
If you've calibrated your espresso machine as detailed above and you still find that your espressos come out inconsistently, here are a number of reasons for you to explore that may remedy the issue before calling a maintenance technician to service and repair your espresso machine.
Espresso inconsistency is a direct result of the variables that affect espresso brewing varying from shot to shot. Grind size and consistency, grind retention, bean freshness, weight, and water quality are all factors that affect the consistency of espresso and must remain consistent.
- Use a grinder that is designed for espresso brewing. They allow you to achieve consistent grind sizes that are also fine enough for brewing espresso. Many espresso grinders have two adjustment levels, namely the outer and inner burr adjustments. The outer burr is usually for coarse adjustments, while the inner burr is for fine adjustments. The outer burr is the easily adjusted one that can be varied every time you need to make adjustments. The inner burr is only necessary to adjust if you are between two grind size settings on the outer burr and you can't dial in the grind setting enough to extract espresso within the desired extraction time.
- Weigh your espresso. You should weigh both the grounds and the final cup. Always aim for a 2x weight extraction, where the final espresso is twice the weight of the grounds, and aim for an extraction within 20–35 seconds, based on roasting level. Tweak based on taste.
- If you use a built-in grinder, make sure the hopper is at least 1/3 full. These grinders rely on gravity and the force of the beans in the hopper to force beans into the grinder. If the hopper is too empty, the grind size will be inconsistent and often too coarse, as there is not enough downward force to feed beans into the grinder.
- Always use fresh beans. The freshness of coffee beans is crucial for proper flavor development. Always use whole coffee beans that are less than one month old. Unless you don't like crema or good coffee,
- Always use the same water. You know what is more important than using the best possible artisan water with the exact mineral and hardness ratios for your coffee? Using water that is consistent from cup to cup. It will be far more beneficial for you to use slightly less optimal water if it means you can keep that water consistent from cup to cup. So use that same brand of purified water or your filtered tap water if that is what you have access to. It may not always be ideal, but your coffee will taste consistent, which is far more important as it will allow you to adjust your other settings to compensate a little.
What is grind retention, and how does it ruin my espresso?
Grind retention is a phenomenon that occurs when finely ground coffee is not fully expelled from the grinder and gets stuck in crevices, resulting in clogging and the transfer of old grounds into the espresso.
When fine coffee grounds get stuck in a coffee grinder, they can fully clog the grinder. Additionally, every time you grind your 18.0 grams for your espresso, some of the stuck coffee grounds get knocked loose and end up in your portafilter, with new, fresh grounds taking their place in the grinder's crevices. This way, you receive stale coffee mixed with your fresh-ground coffee, resulting in inconsistent coffee.
The best remedy for this is to first use a grinder designed for espresso grinding. These grinders are designed to minimize possible strongholds for coffee grounds and are very good at transferring all of the coffee to your portafilter. Second, be sure to clean your grinder monthly. I recommend doing it when you descale your espresso machine. Since the descaling cycles often take 20 minutes with you twiddling your thumbs, you might as well take the time to clean your grinder of any buildup. Cleaning it at least monthly will give you the best results for espresso, even if your grinder is susceptible to grind retention, as the oldest grounds that can end up in your espresso are no older than one month. Not ideal, but also not a deal breaker and a good way to prevent having to shell out hundreds of dollars on a new grinder that is better.
Remember to always weigh your coffee grounds to make sure that even if your grinder withholds some grounds, you have enough in your portafilter to brew your coffee.

Why is there no crema on your espresso?
Crema is the result of water running slowly through coffee with sufficient pressure to bind with the oils and create crema. For crema to develop, fresh, dark-roasted beans are crucial, as these have enough oils deposited on the bean to foam up and build crema.
If you do not have crema developing on your espresso, make sure your beans are fresh, dark roasted, and shiny in the bag. If they are dull in color, they likely aren't roasted dark enough. The shine is a good indication of enough oil presence to result in the foaming effect that we call crema.
If your beans meet these criteria and you still don't have good crema, make sure your coffee is compacted tightly with firm tamping and that 18 grams of ground coffee extract to 36 grams of espresso in 20–25 seconds. If your extraction is faster than this, your grounds are too coarse and need to be ground finer. If the extraction is slower, increase the grind size to get to the 20–25 second range.
If you still cannot achieve crema, review your water. It may be that your water is too pure and does not have enough minerals to extract properly. Switch to purified water from the store and see if that fixes the issue!
Happy brewing and drinking! Cheers!